
This one little gear will save you over $4,000 USD
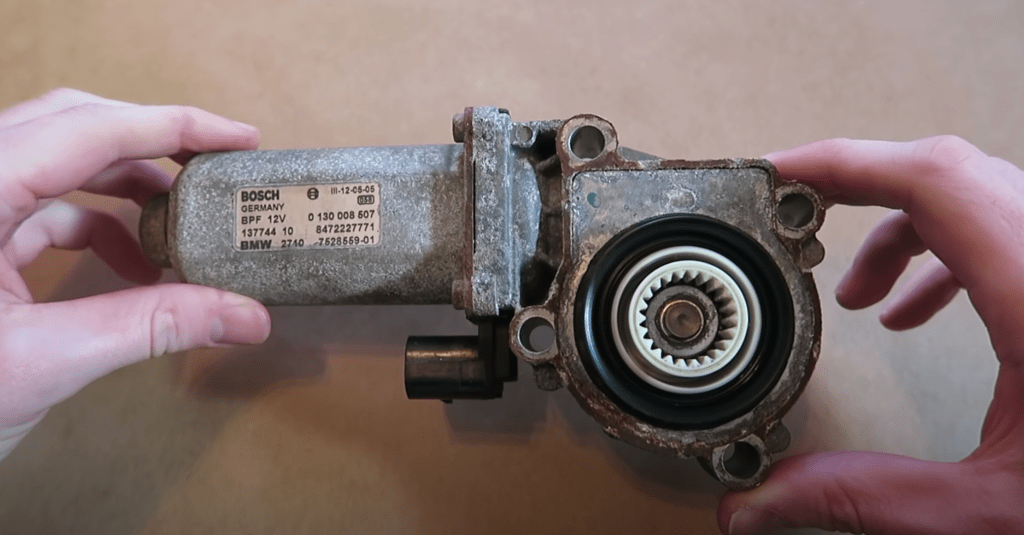
The BMW X3 and X5 are known for their incredible x-drive all wheel drive systems that power through stormy winter conditions and keep you safe on the road. They’re also known for being incredibly robust, rarely having any major failure of the transfer case systems, as they are typically overbuilt by design. The X5’s ATC 500 transfer case is particularly robust.
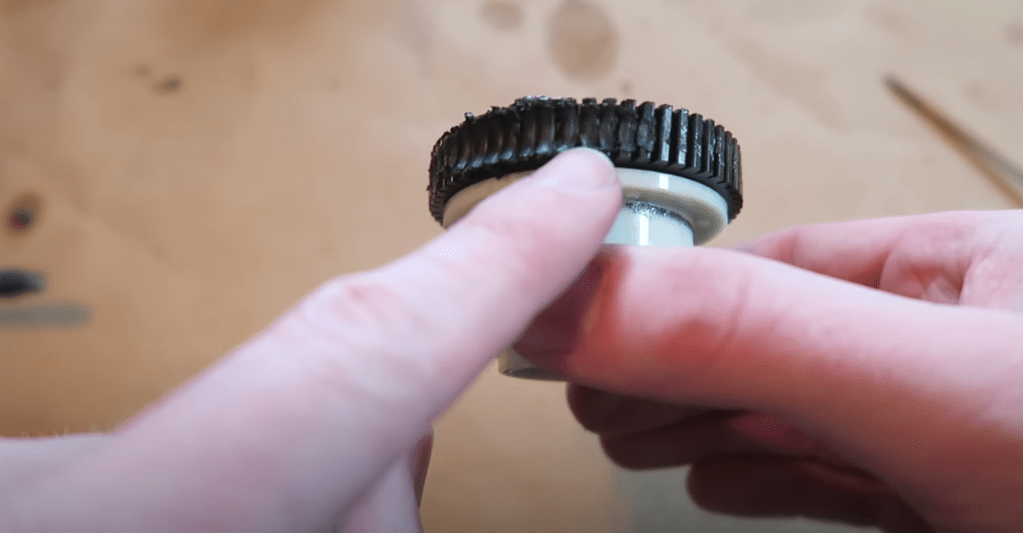
However, one small detail was overlooked on the design by BMW mechanical engineers: the small plastic gear inside the transfer case actuator motor. This small gear typically fails between 90,000 -120,000 miles in the X3 and X5. When it does fail, it throws the car’s computer systems into disarray and will show the trifecta of lights: Brake, ABS, and 4×4 DSC lights will all illuminate on the gauge cluster.
Perhaps this is a planned failure, kind of like BMW’s version of planned obsolescence. If millions of X3 and X5 suffer this failure, that means millions of new reasons for customers to either pay heavily for dealership repair services or trade in for a new model BMW. Perhaps this is too cynical, who really knows.
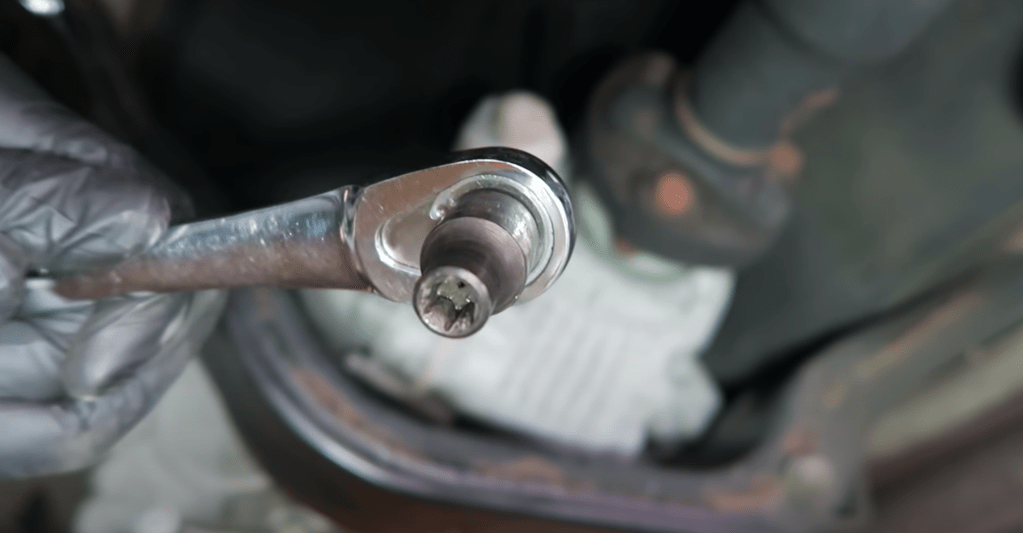
Sometimes, when this gear has failed, an audible clicking may be heard from under the driver side of the car when turning the ignition off. This is the transfer case actuator trying to work but it can’t as the gear’s teeth are stripped by the metal worm drive gear that rides against it. The factory plastic wears down over time causing the failure. When the position of the actuator is no longer known, this throws off the rest of the computer systems that rely on that position as an input signal.
My Experience with my X5 transfer case failure
In 2016, shortly after purchasing our E53 X5, we experienced these warning lights, the intermittent clicking from the actuator and saw the BMW fault code 5F39 or 5F3A. We brought the car in for some inspection at a local Fairfield county Connecticut BMW dealership. Here is where we were delivered the bad news: “Sorry, you’re going to need a new transfer case, the cost is over $4,000 USD.”
This was a really stressful experience, and I was shocked that this happened to us so soon after buying our first X5. Being responsible for the car buying and repairs in my family, this was the worst car news I could deliver to my wife about her new SUV. I decided to do a little more research and more digging. First, I bought myself a BMW specific scan tool so I no longer needed the dealership for diagnostic troubleshooting work. I chose the Creator C310 here on Amazon.
As it turns out, many owners have experienced this transfer case actuator failure which throws these lights and trouble codes. I was determined to try to repair ours or at least remove the actuator for inspection – we had nothing to lose.
First, you need to diagnose the issue by scanning the car’s computers and inspecting the gear. Here’s how to diagnose a potential failure in the transfer case actuator gear system.
Once you’ve established this is likely the cause of your X3 or X5 issues, you will need to order a new updated gear. You can order a carbon fiber reinforced nylon gear which is virtually indestructible here: new transfer case gear.
(photo of gear here link to my shop)
E53 X5, E70 X5, E83 X3 Transfer Case Gear Replacement DIY
Next, you can begin replacement of your transfer case actuator gear once you receive it. You will need the following tools and special socket sizes in order to perform this job:
- Micro flathead screwdriver for removal of the transfer case actuator resistor harness connector plug bolted to the side of the motor.
- Female torx sockets size E10 for removal of 4 torx bolts holding on motor
- Female torx socket size E7 for unbolting transfer case resistor if necessary
- C-clip retaining ring removal plier for removal of circlip on gear shaft
- Knife for assistance in prying up small metal cover on housing of motor
Here are the steps to installing your new carbon fiber nylon transfer case gear:
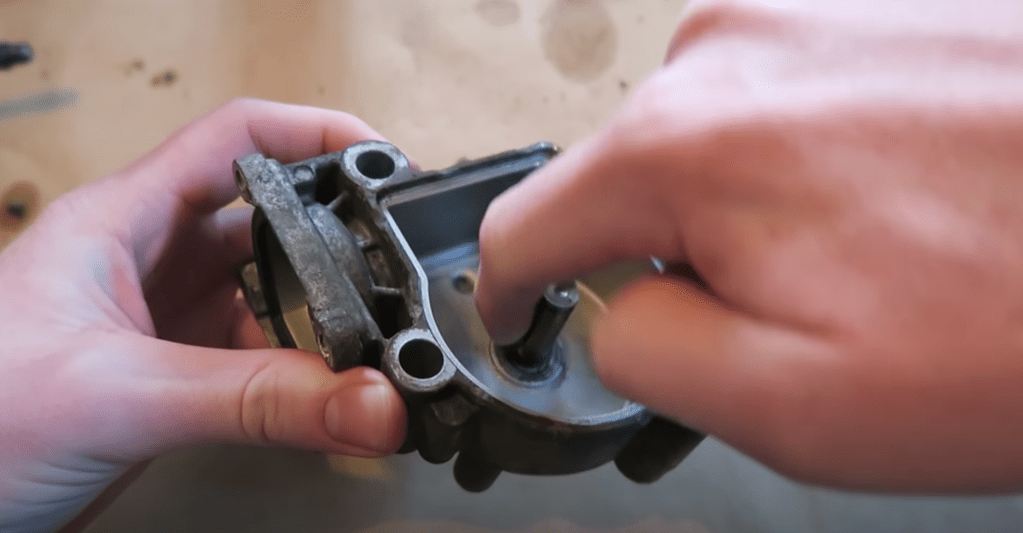
- Remove four E10 torx bolts that secure the actuator motor to the transfer case and set them aside in a safe space.

2. Unplug the harness to the transfer case actuator. Unplug the harness to the resistor on the side of the transfer case motor.

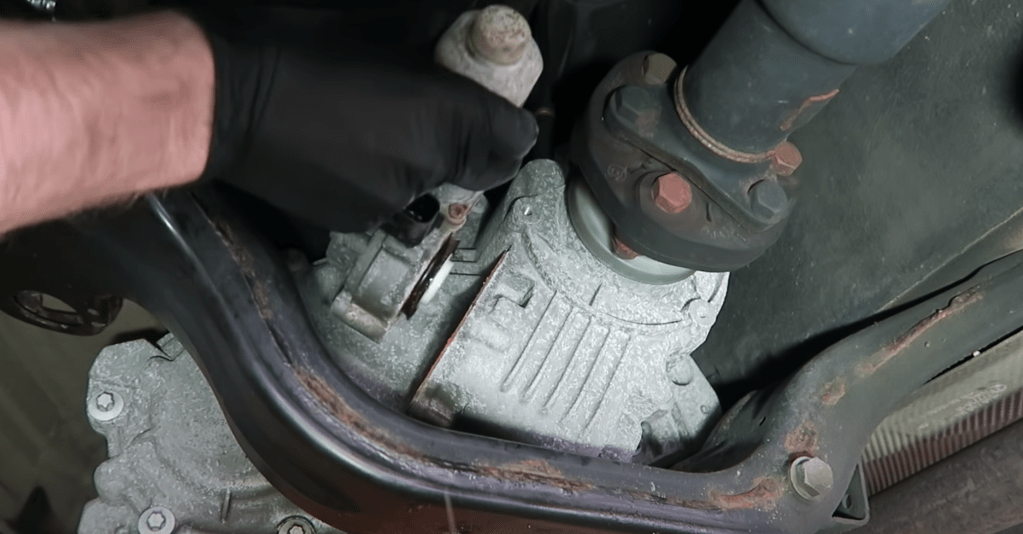
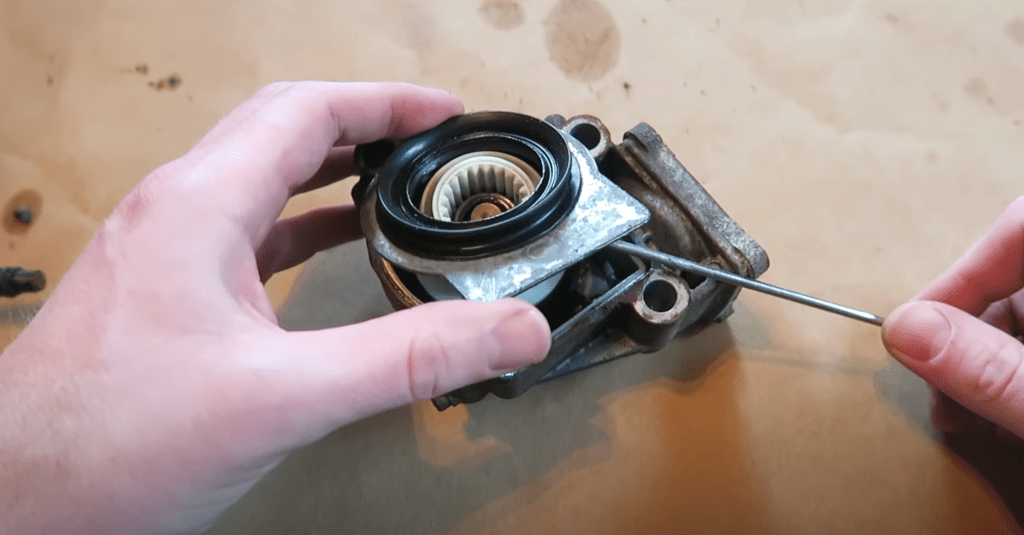
3. Remove transfer case actuator motor from the transfer case
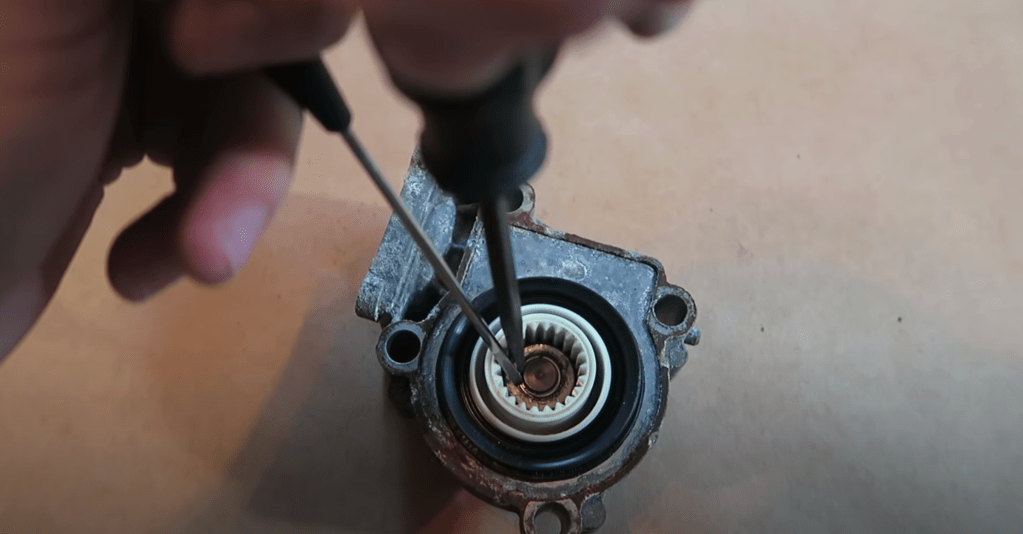
4. Remove c-clip on shaft of motor to allow for gear removal
5. Pry up metal housing cover and lift off motor. Use WD40 if corroded.
6. Remove white gear and old black plastic drive gear

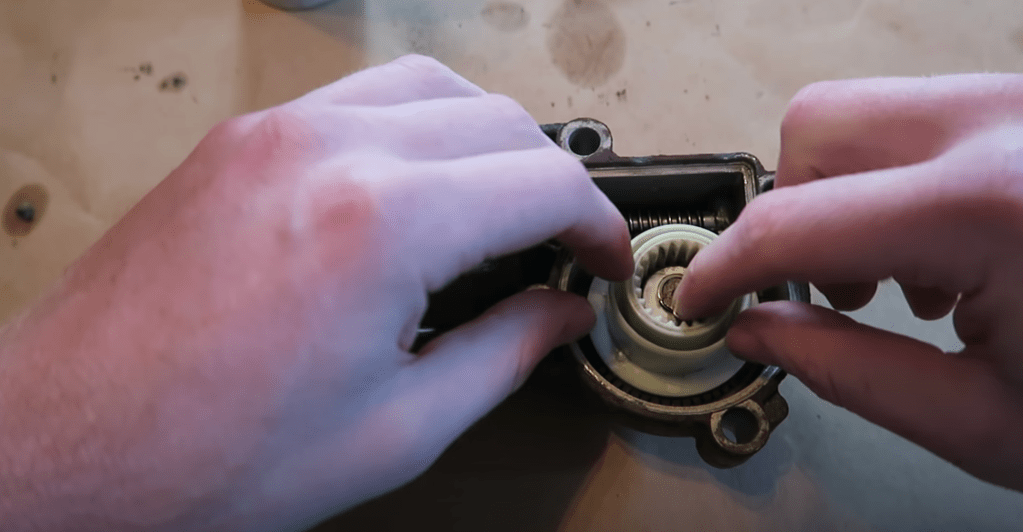
7. Clean any debris or plastic in the housing, apply molybdenum grease to points inside the gear housing as needed.

8. Reassemble with new gear in actuator motor


9. Install metal housing cover, tap down around perimeter to secure
10. Re-install motor assembly to transfer case
11. Install the four E10 torx bolts
12. Plug in actuator harness and resistor harness
13. Celebrate! You’ve just saved $4,000 USD
Buy a new Carbon Fiber reinforced Nylon gear here.
This article contains affiliate links. If you click my custom link to purchase a product, I will earn a small commission at no extra cost to you. Win!
Disclaimer: Due to factors beyond the control of BIMMERZEIT, we cannot guarantee against improper use or unauthorized modifications of this information. BIMMERZEIT assumes no liability for property damage or injury incurred as a result of any of the information contained in this post. Use this information at your own risk. BIMMERZEIT recommends safe practices when working on vehicles and or with tools seen or implied in this post. Due to factors beyond the control of BIMMERZEIT no information contained in this video or post shall create any expressed or implied warranty or guarantee of any particular result. Any injury, damage, or loss that may result from improper use of these tools, equipment, or from the information contained in this post or video is the sole responsibility of the user and not BIMMERZEIT. Video and Content is owned by BIMMERZEIT © 2020

Nice write up. I followed it and was very helpful. I’ve had the 4×4 light for some time (no ABS or DSC lights, only the 4×4), but finally got around to it today. Contrary to diagnosing advice, I’ve never noticed noticed noise from the actuator motor, et al. Fast forward, i opened up the gearbox and to my surprise, the plastic gear was not damaged, so didn’t find the “smoking gun”. However,i rotated the worm gear output shaft from the electric motor and it wasn’t rotating “freely”, but rather “stepped”. Uncertain if this is normal. Perhaps the issue is this? Thnx
LikeLike
hey Tim, typically the brake and ABS lights come on together with this issue. I would recommend the first diagnosis to be scanning the OBD-II port of the car with a BMW code reader such as the C310 recommended in the article. This will allow you to read the trouble codes present for your 4X4 light. Otherwise you’re just driving blind!
LikeLike